EM default Port 7799
Open a browser, and access the Enterprise Manager Cloud Control Console using the following URL format:https://<oms_host_name>:<console_port>/emEnsure that the OMS host name is a fully qualified name, and the console port is the port you identified in the previous step.
On the Login screen, enter the user name sysman, and the password you provided for this user account at the time of installation, and click Login.
If you see an agreement page, click I Accept.
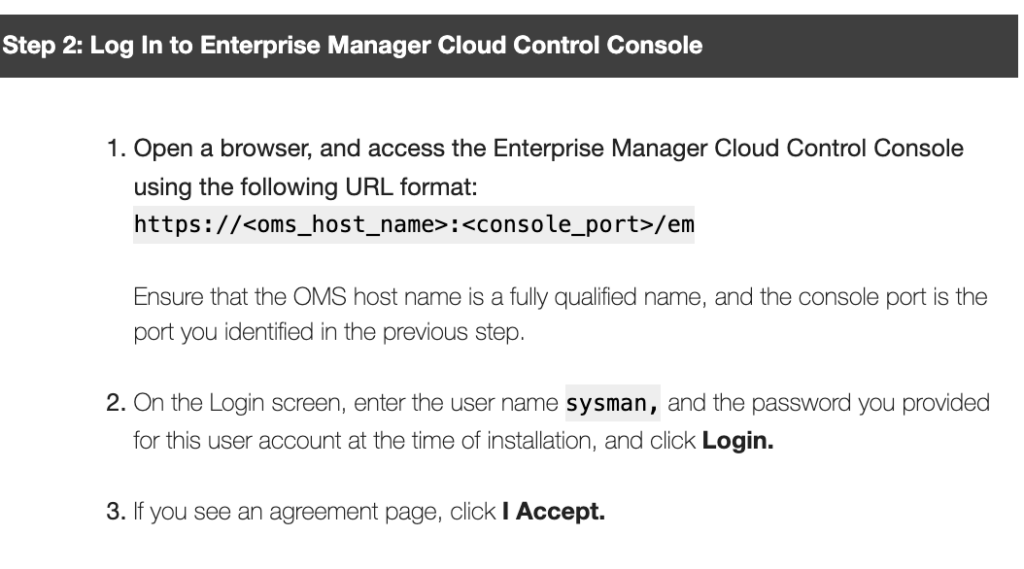
https://138.2.5.68:7799/em/faces/logon/core-uifwk-console-login

检查版本:
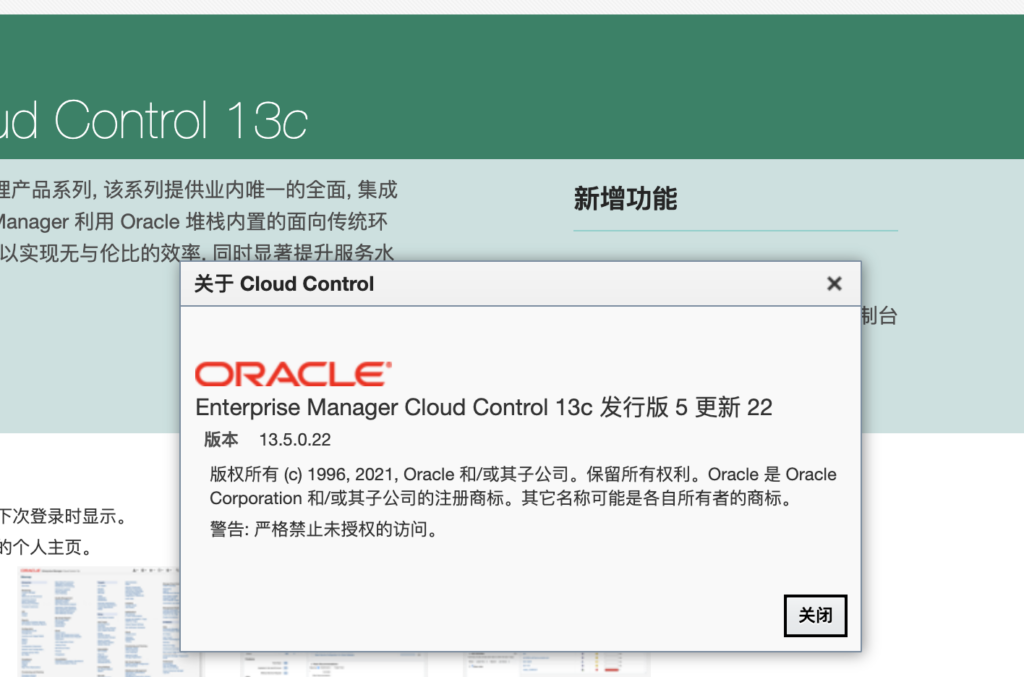
检查版本
./emctl getversion oms
Oracle Enterprise Manager Cloud Control 13c Release 5
Copyright (c) 1996, 2021 Oracle Corporation. All rights reserved.
Oracle Enterprise Manager Cloud Control OMS 13c Release 5
./emctl status oms -details
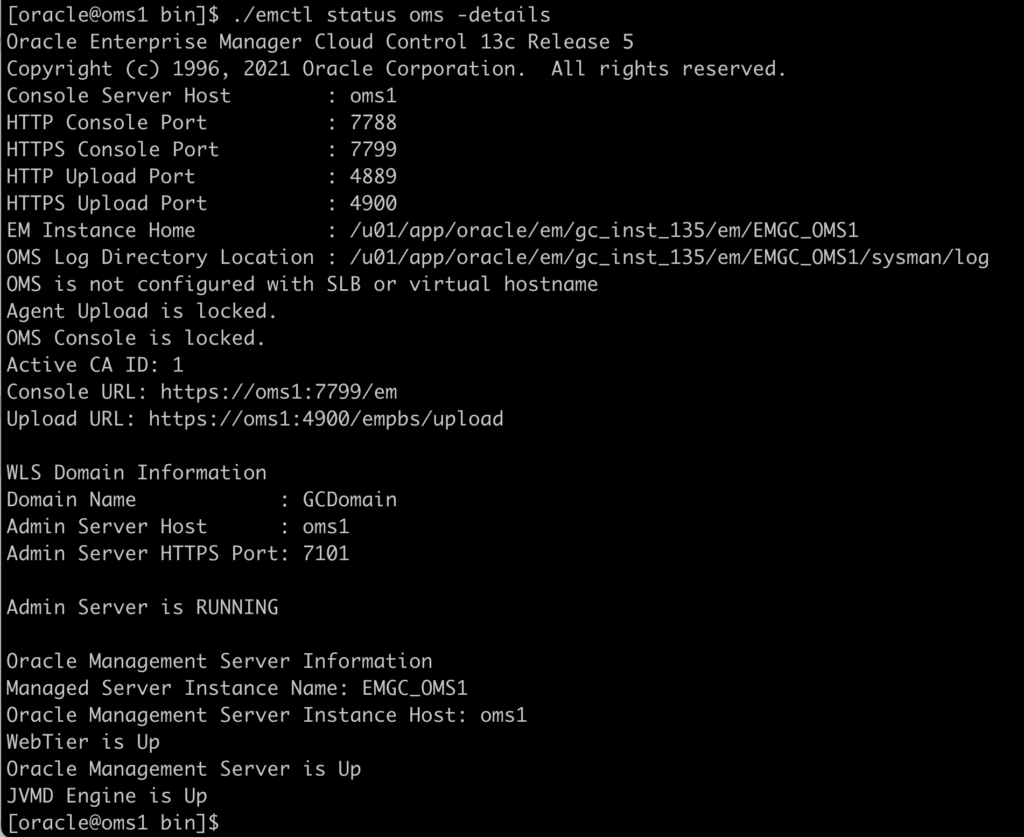
./emcli list_plugins_on_agent
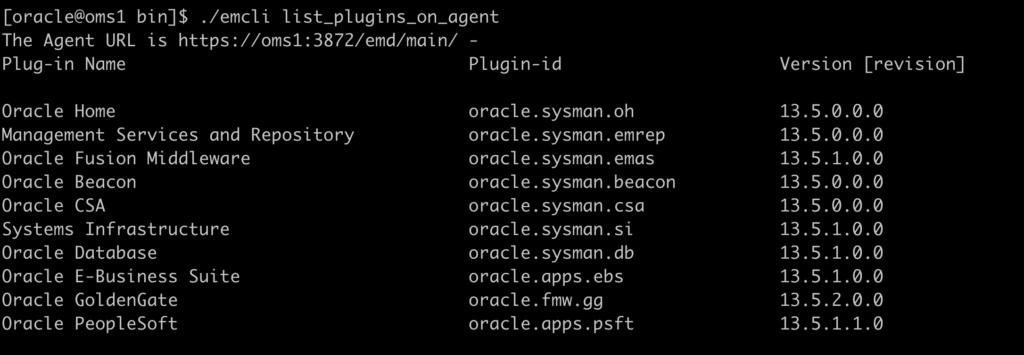
检查是否已经打好Patch
opatch lsinventory

Download OGG EM plugin patch
Download ogg Plugin patch for EM from https://mosemp.us.oracle.com/
Product Management Pack for Oracle GoldenGate
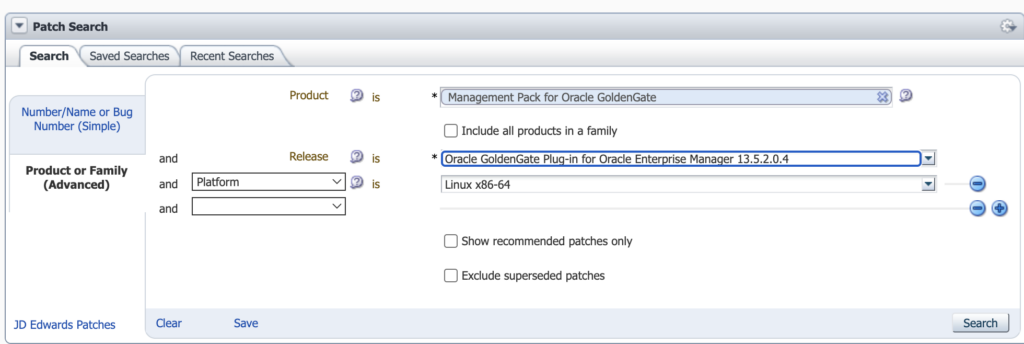
EM Plugin for OGG 13.5.2.0.5
https://ocichina001.objectstorage.ap-tokyo-1.oci.customer-oci.com/p/6fLjFto2V_2xu9MOCeEjGx4NlfeyOvzX7gbuSM7EEWj54CJHUjZwONorpASCNYK0/n/ocichina001/b/bucket-felix/o/p36721505_135205_Generic.zip
Download OPatch version 13.9.3.3.0
https://updates.oracle.com/download/6880880.html
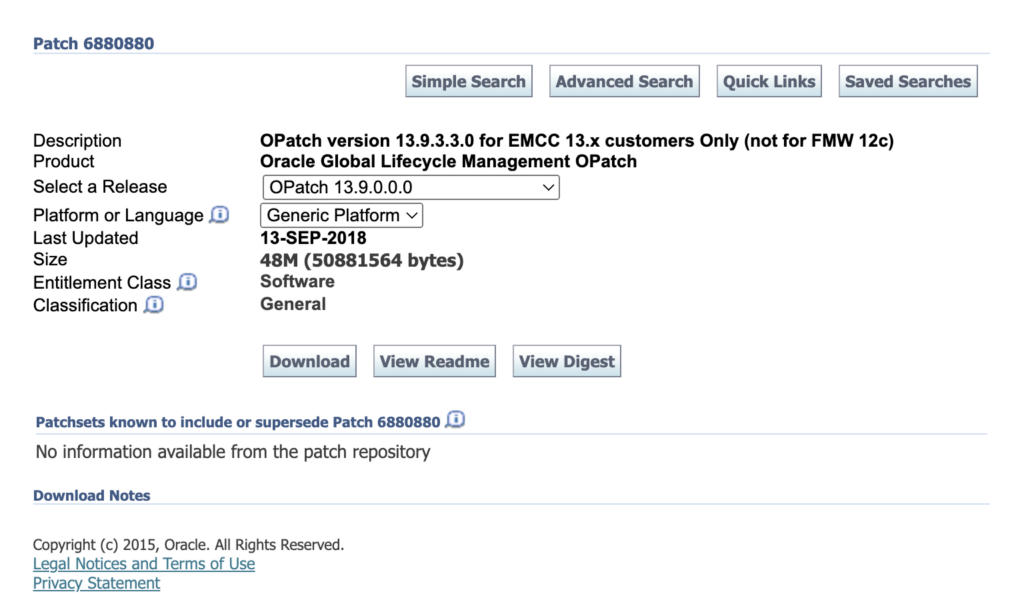
OPatch 13.9.3.3 ocichina001 download link
https://ocichina001.objectstorage.ap-tokyo-1.oci.customer-oci.com/p/6fLjFto2V_2xu9MOCeEjGx4NlfeyOvzX7gbuSM7EEWj54CJHUjZwONorpASCNYK0/n/ocichina001/b/bucket-felix/o/p6880880_139000_Generic.zip
How to install Opatch utility ?
1. Download the latest Opatch utility
2. Take a backup of older version of OPatch utility under $ORACLE_HOME and unzip the downloaded file
cd $ORACLE_HOME
mv OPatch OPatch.bkp
unzip <download directory>/p6880880_<version>_<platform>.zip
cd OPatch
./opatch version
3. Include OPatch in PATH
export PATH=$ORACLE_HOME/OPatch:$PATH
Install OPatch
./jdk/bin/java -jar ./6880880/opatch_generic.jar -silent oracle_home=$ORACLE_HOME
./jdk/bin/java -jar ./6880880/opatch_generic.jar -silent oracle_home=$ORACLE_HOME -invPtrLoc /u01/app/oracle/oraInventory
注意检查OPatch到版本是,有两个地方,一个Oracle Database 的OPatch(在目录 $ORACLE_HOME下面),一个 EM Middleware的 OPatch:分别查看版本:
EM Middleware Home location: /u01/app/oracle/em/middleware_135
EM Agent Home location: /u01/emagent/agent_13.5.0.0.0
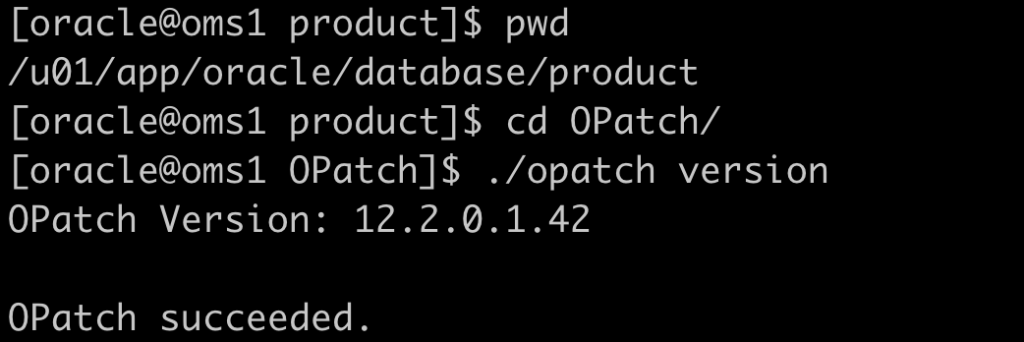

Download ogg monitor
ogg monitor ocichina001 download link
https://ocichina001.objectstorage.ap-tokyo-1.oci.customer-oci.com/p/6fLjFto2V_2xu9MOCeEjGx4NlfeyOvzX7gbuSM7EEWj54CJHUjZwONorpASCNYK0/n/ocichina001/b/bucket-felix/o/fmw_12.2.1.2.0_ogg_Disk1_1of1.zip
ogg Monitor rsp file
agent.rsp
#DO NOT CHANGE THIS.
Response File Version=1.0.0.0.0
[GENERIC]
#The oracle home location. This can be an existing Oracle Home or a new Oracle Home
ORACLE_HOME=/u01/ggmon
INSTALL_TYPE=GoldenGate Monitor Agent Installation
Install OGG monitor silent
java -jar fmw_12.2.1.2.0_ogg.jar -silent -responseFile /home/opc/GGmonitor/agent.rsp -invPtrLoc /u01/app/oraInventory/oraInst.locOracle Management Service 13c Release 5 (13.5.2.0.0) System Patch
Patch for Bug# 36721505
Platform: Generic
Plug-in Version: 13.5.2.0.5
Released: Jul 4, 2024
This document describes how you can install a System patch on your Oracle
Mangement Service 13c Release 5 (13.5.2.0.0). A System patch allows you to patch complex systems (or) sub-systems in a more deterministic fashion with
proper automation. Technically, a System patch consists of sub-patches for
various sub-systems of a complex system. For OMS, the sub-systems are
represented as core and plugins. Starting with Enterprise Manager 13c, you can
use a single unified command called OMSPatcher for automating the process of
applying System patches on your OMS.
This System patch is classified as rolling patch
Sub Patches of the OMS Patch and the Bugs Fixed
The below bugs are fixed as part of this sub-patch:
36774395 – Parallel replicat metrics values shows incorrect
36770396 – Getting OGGMAResponseProcessException while trying to stop extract/replicat processs in goldengate multi deployment nginx setup
36694686 – pmrsvr, recsvr, adminsvr, and distsvr processes are showing as down in GoldenGate dashboard.
36673821 – Replicat/extract status is shown as running in metrics table even after stopping the replicat/extract
36658521 – Auto discovery for GoldenGate Microservice fails with error “org.glassfish.json.JsonObjectBuilderImpl$JsonObjectImpl cannot be cast to java.lang.String”
36523603 – OGG MA NGINX Service manager status display as availablity evaluation error when service is down
36380768 – Backport bug 35055994 to 13.5.2.0.4 – Targets are not discovered when there are multiple deployments and any pmsrvr is down
36380781 – Backport bug 36340236 into 13.5.2.0.0 – OGG MA adminsrvr, distsrvr, recvsrvr and pmsrvr targets is showing as DOWN post 13.5.2.0.3 patching
35810121 – GGMA Targets Availability Evaluation Error After agctl stop goldengate
35823552 – OGGPLGN 13.5.2.X “Seconds Since Last OGG Checkpoint” metric missing for OGG MA Targets (Extract)
35939883 – EM 13.5 Golden Gate Microservices – Assign Secondary Agent using EMCLI
36008737 – Replace SimpleDateFormat with an alternate class that is thread safe
34719246 – OEM GoldenGate target page does not load
34166330 – RecvPathTableStatsMetric Result has repeating key value
35300004 – OGG microsvs path not found errors continuously
35579242 – Unable to modify Monitoring credentials
35712118 – Distribution service metrics is not displaying metrics if there is any path that is pointing to extract trail that does not exist
Prerequisites
Before you install or deinstall the patch, ensure that you meet the following
requirements:
Note: In case of a multi-OMS environment, you need to perform steps 5 to 12 on
each of the OMS hosts.
- Ensure that the Software Library is configured.
- Ensure that the Oracle WebLogic Administration server that hosts the
OMS is up and running. - Ensure that the Oracle Database, which houses the Management
Repository and its listener are up and running. - Ensure that the Oracle Management Service (OMS) on which you are
installing the patch or from which you are rolling back the patch is Oracle
Management Service 13c Release 5 (13.5.2.0.0). - Ensure that you have the latest version of OPatch 13.9.1.0.0 and
OMSPatcher 13.9.4.2.2 on all OMS instance platform homes.
If you are not sure about the OPatch version you have, or to download the
latest version, follow the instructions outlined in the My Oracle Support note
224346.1 available at:
https://support.oracle.com/CSP/main/article?cmd=show&type=NOT&id=224346.1
If you are not sure about the OMSPatcher version you have, or to download the
latest version, follow the instructions outlined in the My Oracle Support note
2203007.1 available at:
https://support.oracle.com/epmos/faces/DocumentDisplay?id=2203007.1 - Ensure that you set the ORACLE_HOME environment variable to OMS core
home - Ensure that you set the PATH environment variable to include the
location of the unzip executable, and the /bin and the
/OMSPatcher directories present in the Oracle home of the OMS. - To use the OMSPatcher functionality, you must set the WebLogic
Administration Server credential access. To avoid setting the credentials
everytime, you can update the property file once with the necessary
information. To do so, see Section 9.1. - Maintain a location for storing the contents of the patch ZIP file. In
the rest of the document, this location (absolute path) is referred to as
. - Extract the contents of the patch ZIP file to the location you created
in Step (2). To do so, run the following command:
$ unzip -d 36721505_135205_Generic.zip - Ensure that you shut down the OMS by running the following command:
$ emctl stop oms
Note: In case of a multi-OMS environment, shut down all the Oracle Management Services.
- Run the following command on each OMS instance home to ensure that you
do not have any issues with configuration, and binary prerequisite checks:
$ cd
ls — It should list bundle.xml along with 36721505 directory.
For installing a System patch
$ omspatcher apply -analyze -property_file
For deinstalling a System patch
$ omspatcher rollback -analyze -id 36721505 -property_file
Note
If the Analyze step fails on a Windows operating system, then check the log
files to see if there is a binary prerequisite failure due to
checkActiveFilesAndExecutables. For more information, see Oracle Enterprise
Manager Cloud Control Administrator’s Guide.
Installing the OMS Patch
To install the patch:
- Navigate to the directory:
$ cd
ls — It should list bundle.xml along with 36721505 directory. - Install the patch by running the following command:
On Unix:
$ omspatcher apply -property_file
On Windows:
omspatcher apply -property_fileNote: Steps to create property file can be seen below in section 9 (9.1 Creating a Property File)Notes:
a. For single OMS environment, omspatcher will run the patching steps.
b. For multi-OMS environment, omspatcher provides readme files in HTML or text format, with a list of steps that you need to run in your environment to
complete the patching process.
c. For stand by OMS, omspatcher prints a list of steps that you need to perform to complete the patching process. For more information, see Section 9.2. - Start the OMS by running the following command:
$ emctl start oms
Note : In case of a multi-OMS environment, you must start all the Oracle Management Services.
Deinstalling the OMS Patch
To deinstall the patch:
- Navigate to the directory:
$ cd
ls — It should list bundle.xml along with 36721505 directory. - Deinstall the patch by running the following command:
On Unix:
$ omspatcher rollback -id 36721505 -property_file
On Windows:
omspatcher rollback -id 36721505 -property_file
For information on how to retrieve the list of sub-patches of the System
patch, see Section 5.
Note
For single OMS environment, omspatcher will run the patching steps.
For multi-OMS environment, omspatcher provides readme files in HTML or text
format, with a list of steps that you need to run in your environment to
complete the patching process.
For stand by OMS, omspatcher prints a list of steps that you need to perform
to complete the patching process.
- Start the OMS by running the following command:
$ emctl start oms
Note: In case of a multi-OMS environment, you must start all the OMSes.
9 Appendix
The appendix contains the following topics:
Creating a Property File
Patching Principles for Standby OMS Configuration
9.1 Creating a Property File
The automated patching functionality achieved using OMSPatcher expects
WebLogic Administration Server URL and credentials as an input for patching
and configuration detection operations. Primarily, the WebLogic Administration
server is the host that manages the Managed Server where the OMS instance is
deployed. If you do not want to set the credentials every time you are
prompted while patching the OMS, you can update the property file. OMSPatcher
allows you to repeatedly provide the inputs using property file option.
Note
Property file for a Primary OMS and Standby OMS are different, as they are in
different domains.
Follow these steps to create a property file for OMSPatcher:
- Run the following script to create the WebLogic encrypted
configuration and key files.
On Unix:
$ OMSPatcher/wlskeys/createkeys.sh -oh
-location
On Windows:
OMSPatcher\wlskeys\createkeys.cmd -oh
-location
When prompted, enter the credentials of the WebLogic Administration Server
that manages the Managed Server on which OMS instance is deployed. Two files
are generated with the file names: config and key.
- Create the property file with the following entries:
AdminServerURL=t3s://:
AdminConfigFile=<‘config’ file location>
AdminKeyFile=<‘key’ file location>
Note: ‘config’ and ‘key’ files gets created on execution of step 1 (createkeys)
9.2 Patching Principles for Standby OMS Configuration
There following are the different types of configurations principles in
standby setup:
Standby OMS – Replicating OMS, Software Library, and Repository Component
If a standby OMS is setup using a file system replication, then there is no
need to apply patch on standby setup separately. If you apply patches on the
primary OMS, then you must replicate the latest changes in the file system to
standby host either manually or using the automatic storage replication.
Note
If you follow this recommendation, you do not have to perform any of the
patching steps required for standby OMS using omspatcher.
For more information, see Enterprise Manager Disaster Recovery chapter in the
Oracle Enterprise Manager Administration guide.
Standby OMS Configured Along with Primary OMS System
When patches are applied on the primary OMS, they have to be applied on the
standby site Management Services too. Typically, the patches update the Oracle
home instances (using the omspatcher apply command), and optionally require
scripts to run on the Management Repository. On the standby site, it is
sufficient to update the Oracle Home instances (using omspatcher), and skip
the running of scripts on the Management Repository because database changes
are automatically propagated to the standby site using Data Guard. To achieve
this, use standby option with the commands omspatcher apply and omspatcher
rollback. For more information about these commands, see Section 7 and Section
8 sections in the Oracle Enterprise Manager Administration guide.
